Email Templates
What This Page Does
This page lets you customize the emails your site sends to users. Whether it is a welcome message after someone signs up, a purchase receipt, a password reset link, or a promotional offer, you control the wording, layout, and which emails are turned on or off.
How to Get Here
Navigate to Admin Panel > Settings > Email Templates
Understanding the Page
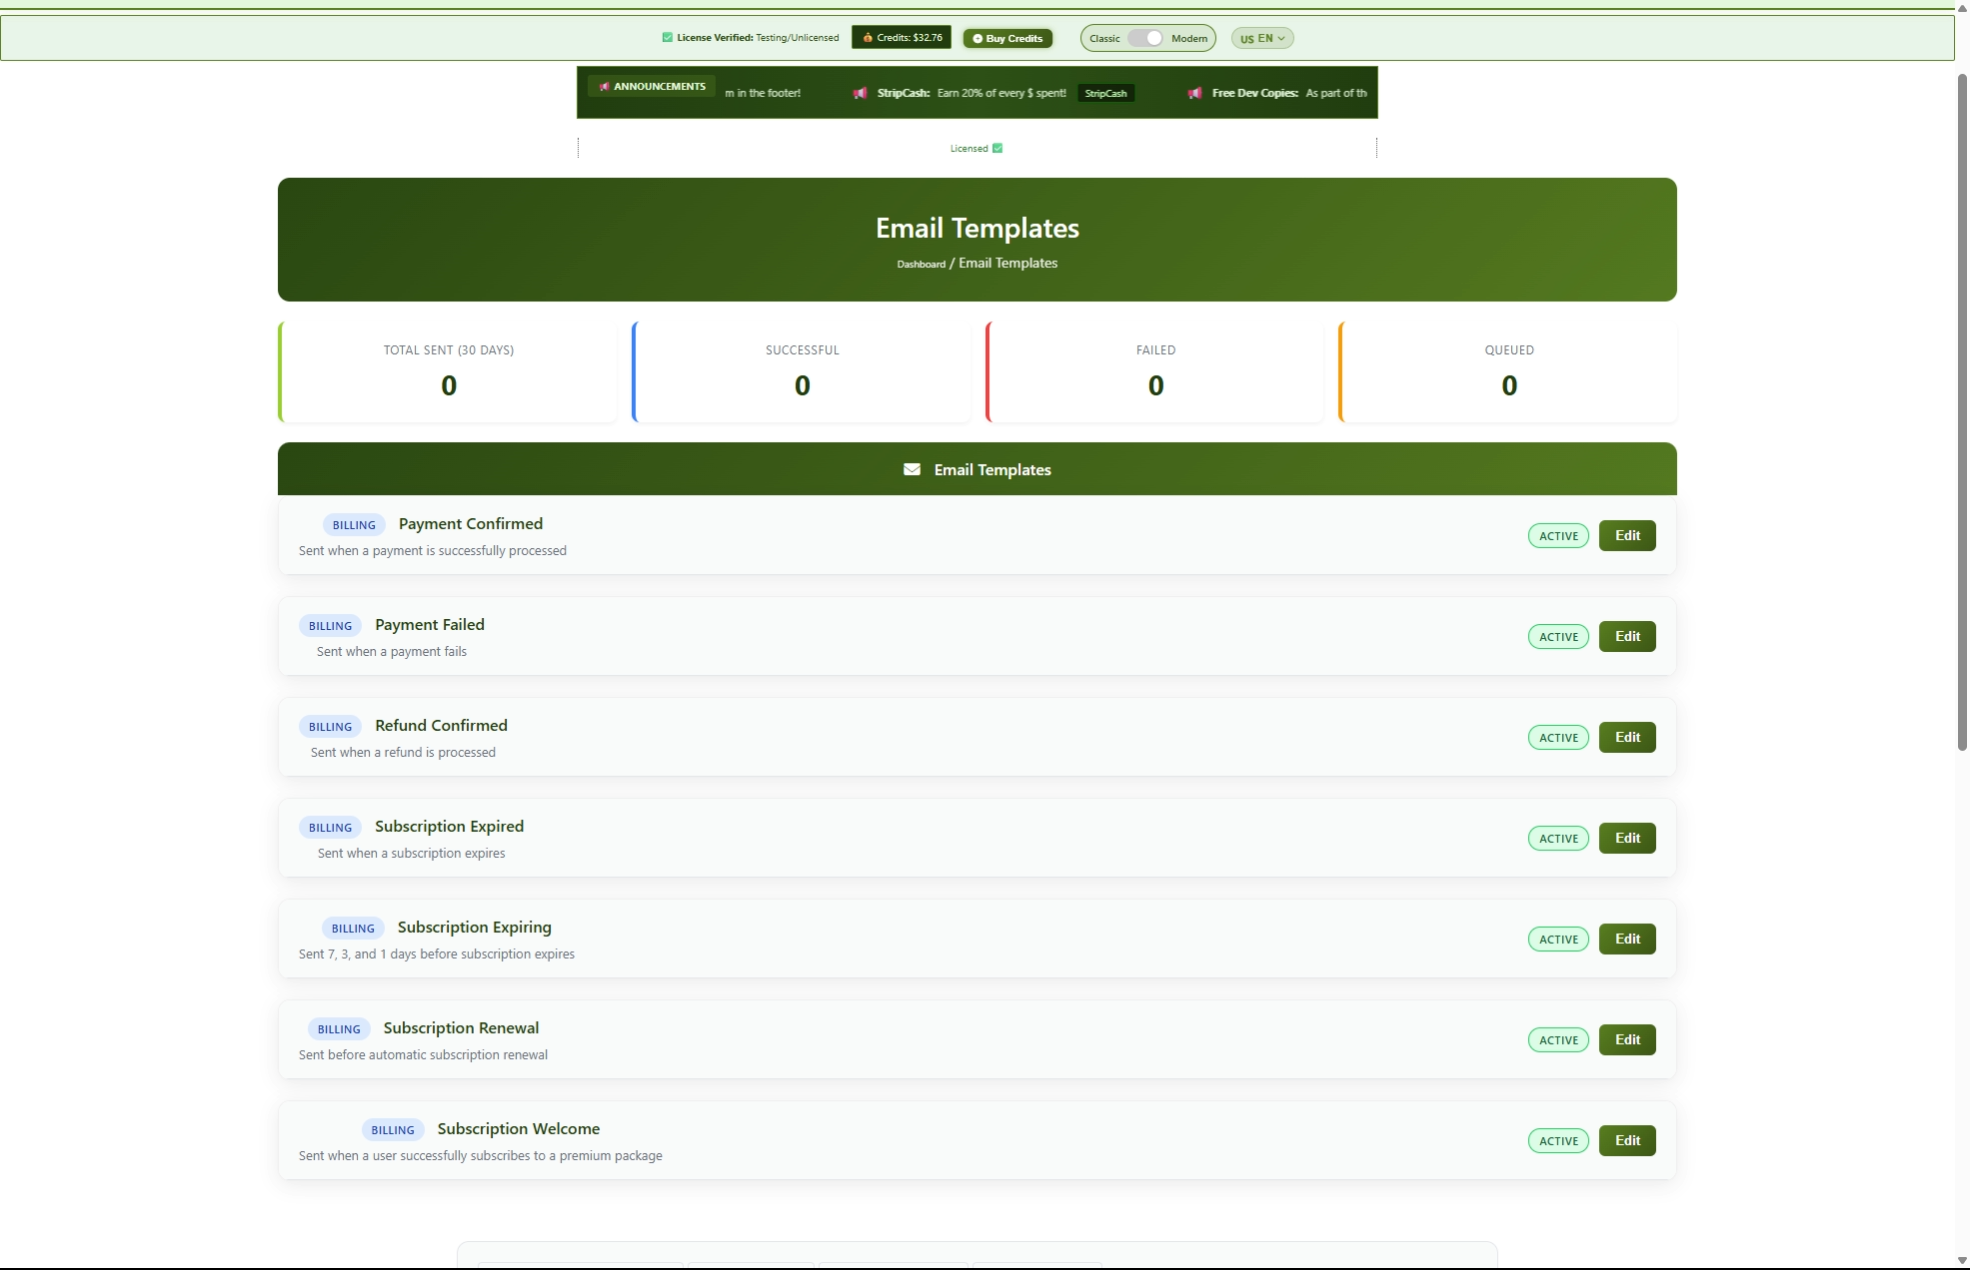
When you open this page, you will see two main areas: a statistics summary at the top and a list of your email templates below it.
Email Statistics
At the top of the page, four cards give you a quick snapshot of how your emails have performed over the last 30 days:

Template List
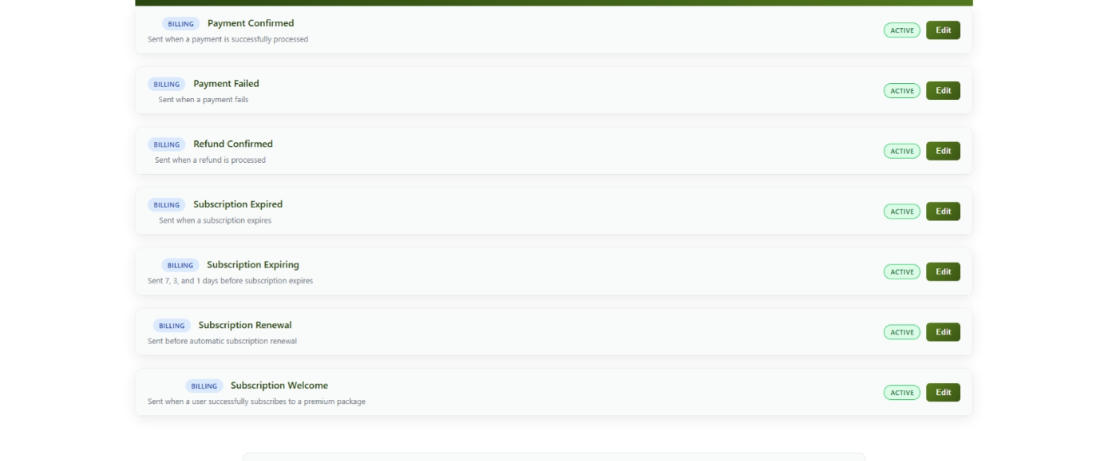
Below the statistics, you will see a list of all your email templates. Each template appears as a card showing:
- A colored badge indicating the template type (blue for Billing, purple for System, yellow for Marketing)
- The template name and a short description of when the email is sent
- A status badge showing whether the template is Active (green) or Inactive (red)
- An Edit button to open the template for editing
Common Tasks
How to Edit an Email Template
You can change the subject line and body of any email your site sends.
- Find the template you want to change in the list.
- Click the Edit button on that template's card.
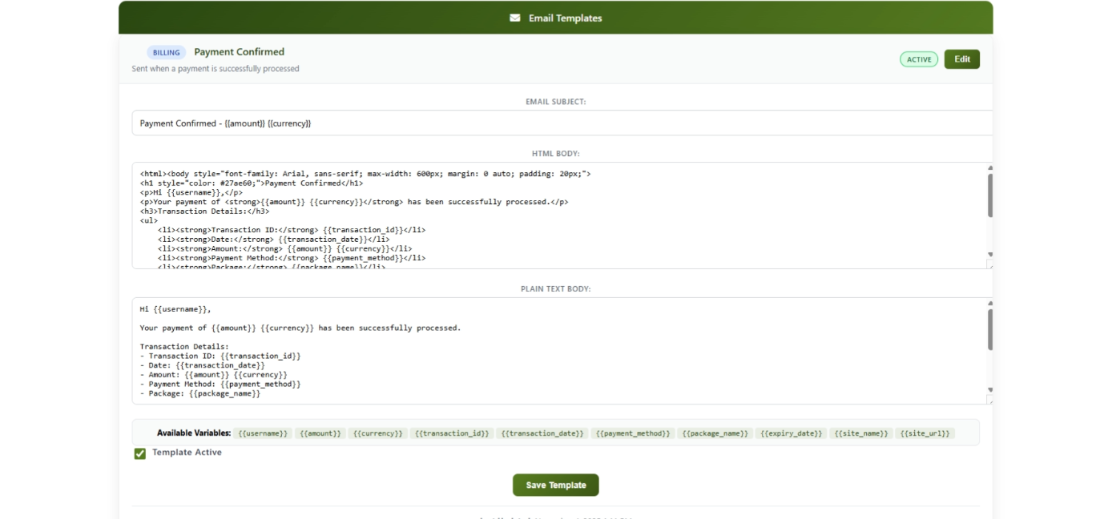
- The card expands to show the editing form.
- Update the Subject field with your desired email subject line.
- Update the HTML Body field. This is the version most email programs will display, and it supports formatting like bold text, links, and images.
- Update the Plain Text Body field. This is the backup version for email programs that do not display formatted content.
- Make sure the Template Active checkbox is checked if you want this email to be sent.
- Click Save Template.
How to Use Placeholder Variables
Each template includes special placeholders that are automatically filled in with real information when the email is sent. For example, {{username}} is replaced with the actual user's name.
Open a template for editing by clicking Edit.Scroll down to the Available Variables section below the text fields. This shows you all the placeholders available for that specific template.
- Type a placeholder into the Subject, HTML Body, or Plain Text Body using the exact format shown:
{{variablename}} - Click Save Template.
Example: If you type Welcome, {{username}}! in the subject line, a user named Sarah will receive an email with the subject "Welcome, Sarah!"
Here are some of the most commonly used placeholders:
How to Turn Off an Email
If you do not want your site to send a particular email, you can disable it.
- Find the template in the list.
- Click Edit to expand it.
- Uncheck the Template Active checkbox.
- Click Save Template.
The template's status badge will change from green (Active) to red (Inactive), and that email will no longer be sent.
How to Turn an Email Back On
- Find the disabled template in the list. It will show a red Inactive badge.
- Click Edit to expand it.
- Check the Template Active checkbox.
- Click Save Template.
The status badge will change back to green (Active), and the email will start being sent again.
Understanding Template Types
Your email templates are organized into three categories. Each category has a colored badge so you can tell them apart at a glance.
Billing Emails (Blue Badge)
These emails are sent automatically when something happens with a user's payment or subscription.
System Emails (Purple Badge)
These emails are sent automatically when users perform account-related actions.
Marketing Emails (Yellow Badge)
These emails are used for promotional campaigns and special offers.
Tips for New Users
- Keep subject lines short and clear. Aim for under 50 characters. Include the most important information first, like "Your Order #12345 Confirmation."
- Always fill in both the HTML and Plain Text versions. This ensures every user can read your emails regardless of their email program.
- Test your templates before going live. Create a test account, trigger the email (for example, request a password reset), and check how it looks in your inbox on both a computer and a phone.
- Review your templates every few months. Make sure links still work, information is up to date, and the tone matches your brand.
- Watch the Failed count in your statistics. If it starts climbing, your emails may have a delivery problem that needs attention.
- For marketing emails, include a way for users to unsubscribe. This is required by email regulations in most countries and helps keep your emails out of spam folders.
Troubleshooting
Emails are not being received by users
What you see: You have active templates and users are performing actions (signing up, buying subscriptions), but they report not receiving emails.
How to fix it:
- Check the Queued statistic card on this page. If the number is high and not going down, your email sending service may not be running properly. Contact your hosting provider or system administrator.
- Check the Failed statistic card. If you see a high number of failures, there may be an issue with your email service configuration. Contact your hosting provider for help.
- Ask users to check their spam or junk folder. Sometimes legitimate emails end up there.
Placeholders show up as raw text in the email
What you see: Users receive an email that says something like "Welcome, {{username}}!" instead of "Welcome, Sarah!"
How to fix it:
- Open the template for editing.
- Check that the placeholder is typed exactly as shown in the Available Variables section.
- Make sure there are no extra spaces inside the curly braces. Use
{{username}}not{{ username }}. - Click Save Template after making corrections.
Emails are landing in spam folders
What you see: Users find your emails in their spam or junk folder instead of their inbox.
How to fix it:
- Avoid using excessive capital letters, exclamation marks, or words like "FREE!!!" in your subject lines.
- Make sure your marketing emails include a way for users to unsubscribe.
- Ask your hosting provider or system administrator to set up SPF, DKIM, and DMARC records for your domain. These are authentication settings that help email providers trust your messages.
- Consider using a dedicated email service for better deliverability.
I cannot edit any templates
What you see: All fields are greyed out and you cannot type or click any buttons.
How to fix it:
This happens when your site is running in demo mode. Demo mode is a read-only preview that prevents any changes. Contact your system administrator to disable demo mode if you need to make changes.
No templates appear on the page
What you see: The page loads but shows a message saying no templates were found.
How to fix it:
The email templates may not have been set up during installation. Contact your system administrator to ensure the email template system has been properly installed.