Obecná nastavení
Co tato stránka dělá
Centrum řízení nastavení je centrální centrum, kde spravujete všechna nastavení jádra pro vaše stránky. Odtud si můžete nastavit název stránky, kontrolovat, jak vypadají náhledy, spravovat podání obsahu, konfigurovat chybové stránky a mnoho dalšího. Berte to jako hlavní ovládací panel pro všechno, co vaše stránky dělají.
Jak se sem dostat
Přejít na Admin Panel > Nastavení > Obecná nastavení
Pochopení stránky
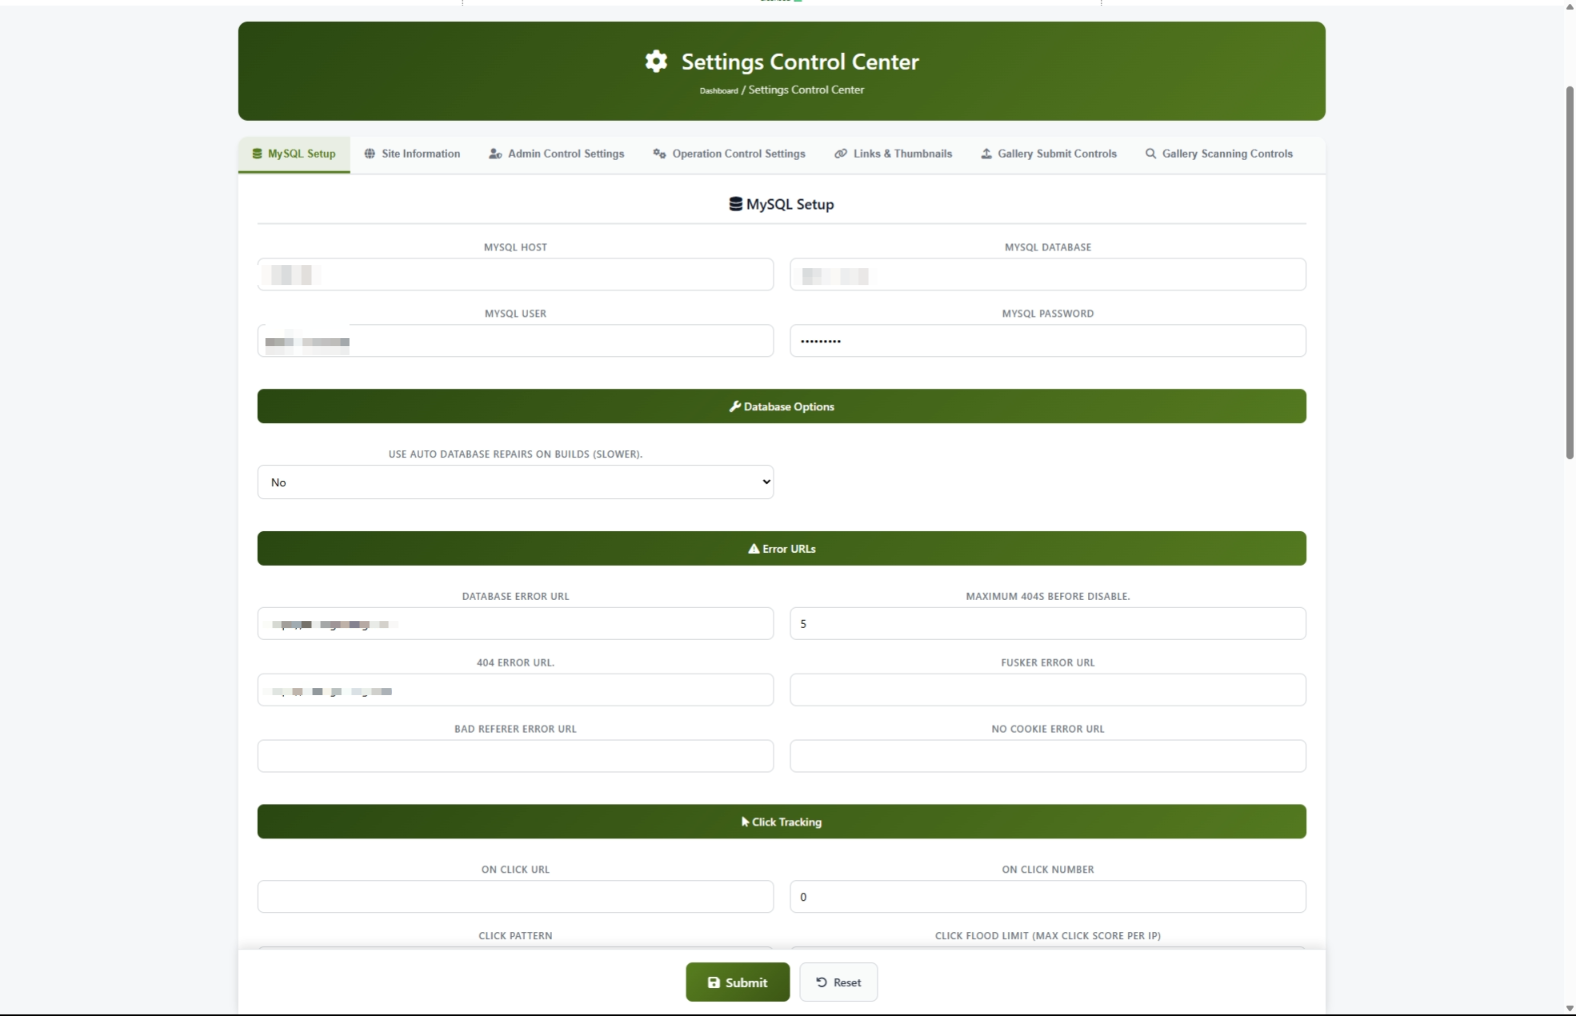
Když otevřete ovládací centrum Nastavení, uvidíte řadu karet v horní části stránky. Každá karta seskupuje související nastavení, abyste rychle našli, co potřebujete.
Tab bar
Nahoře je sedm karet:
Kliknutím na jakoukoli kartu přepněte na tuto sekci. Aktivní záložka je zvýrazněna zeleným okrajem dole.
#scanning na konci webové adresy.Tlačítko Uložit
V dolní části stránky najdete Odeslat tlačítko uložit změny a Obnovit Tlačítko pro zrušení neuložených změn.
Společné úkoly
Jak nastavit název a podrobnosti vašich stránek (First- Time Nastavení)
Když poprvé nainstalujete ComusThummz, je to jedna z prvních věcí, které byste měli udělat.
- Klikněte na tlačítko Informace o stránkách Účet.
- Napište své jméno stránky do Název lokality pole. Drž to pod 60 znaků. To je to, co se objeví v záložkách prohlížeče a výsledků vyhledávače.
- Napište krátký popis vašeho webu v Popis místa pole. Udržujte to mezi 150 a 160 znaky. To je to, co vyhledávače ukazují pod vaším názvem webu.
- Napište název domény Název domény pole. Použít jen doménu bez "http: / /" nebo "www." -- například,
example.com. - Napište svou e-mailovou adresu Admin Email pole. Sem se zasílají systémová hlášení.
- Napište své jméno nebo název společnosti do Jméno majitele pole.
- Klikněte Odeslat v dolní části stránky.
- Otevřete nové soukromé / inkognito okno prohlížeče a navštivte vaše stránky potvrdit nadpis a popis se objeví správně.

Jak nastavit velikosti náhledu
Náhledy jsou malé náhled obrázky, které se objeví v mřížkách na vašich stránkách. Zde je, jak nastavit jejich velikost a kvalitu.
- Klikněte na tlačítko Odkazy a náhledy Účet.
- Sroll dolů na Nastavení náhledu sekce.
- Nastavit Šířka náhledu v pixelech (například,
220). - Nastavit Výška náhledu v pixelech (například,
180). - Nastavit Kvalita paže na číslo mezi 1 a 100. Vyšší čísla znamenají lepší kvalitu, ale větší velikosti souborů.
- Klikněte Odeslat.
Jak nastavit chybové stránky
Chybové stránky jsou tam, kam jsou vaši návštěvníci posíláni, když se něco pokazí. Nastavení těchto správně udržuje návštěvníky na vašich stránkách místo toho, aby jim matoucí chybové zprávy.
- Click the MySQL Setup tab.
- Scroll to the Error URLs section.
- Fill in each field with a full web address (including
https://):
- Database Error URL -- Where visitors go if the site has a temporary problem. Use a simple "We'll be back soon" page.
- 404 Error URL -- Where visitors go when they try to reach a page that does not exist.
- No Cookie Error URL -- Where visitors go if their browser blocks cookies.
- Click Submit.
http:// or https://. If you leave off the prefix, the address will be silently cleared when you save.How to Set Up Click Protection
Click protection prevents automated bots from abusing your site by clicking links too quickly.
- Click the MySQL Setup tab.
- Scroll to the Click Tracking section.
- Set the Click Flood Limit to control how many clicks are allowed before a visitor is temporarily blocked. The default of
180works well for most sites. - Enter a web address in the Click Flood Error URL field. This is where blocked visitors are sent.
- If you want to make sure you or trusted partners are never blocked, add your internet addresses to the Click Flood Whitelist field, separated by commas.
- Click Submit.
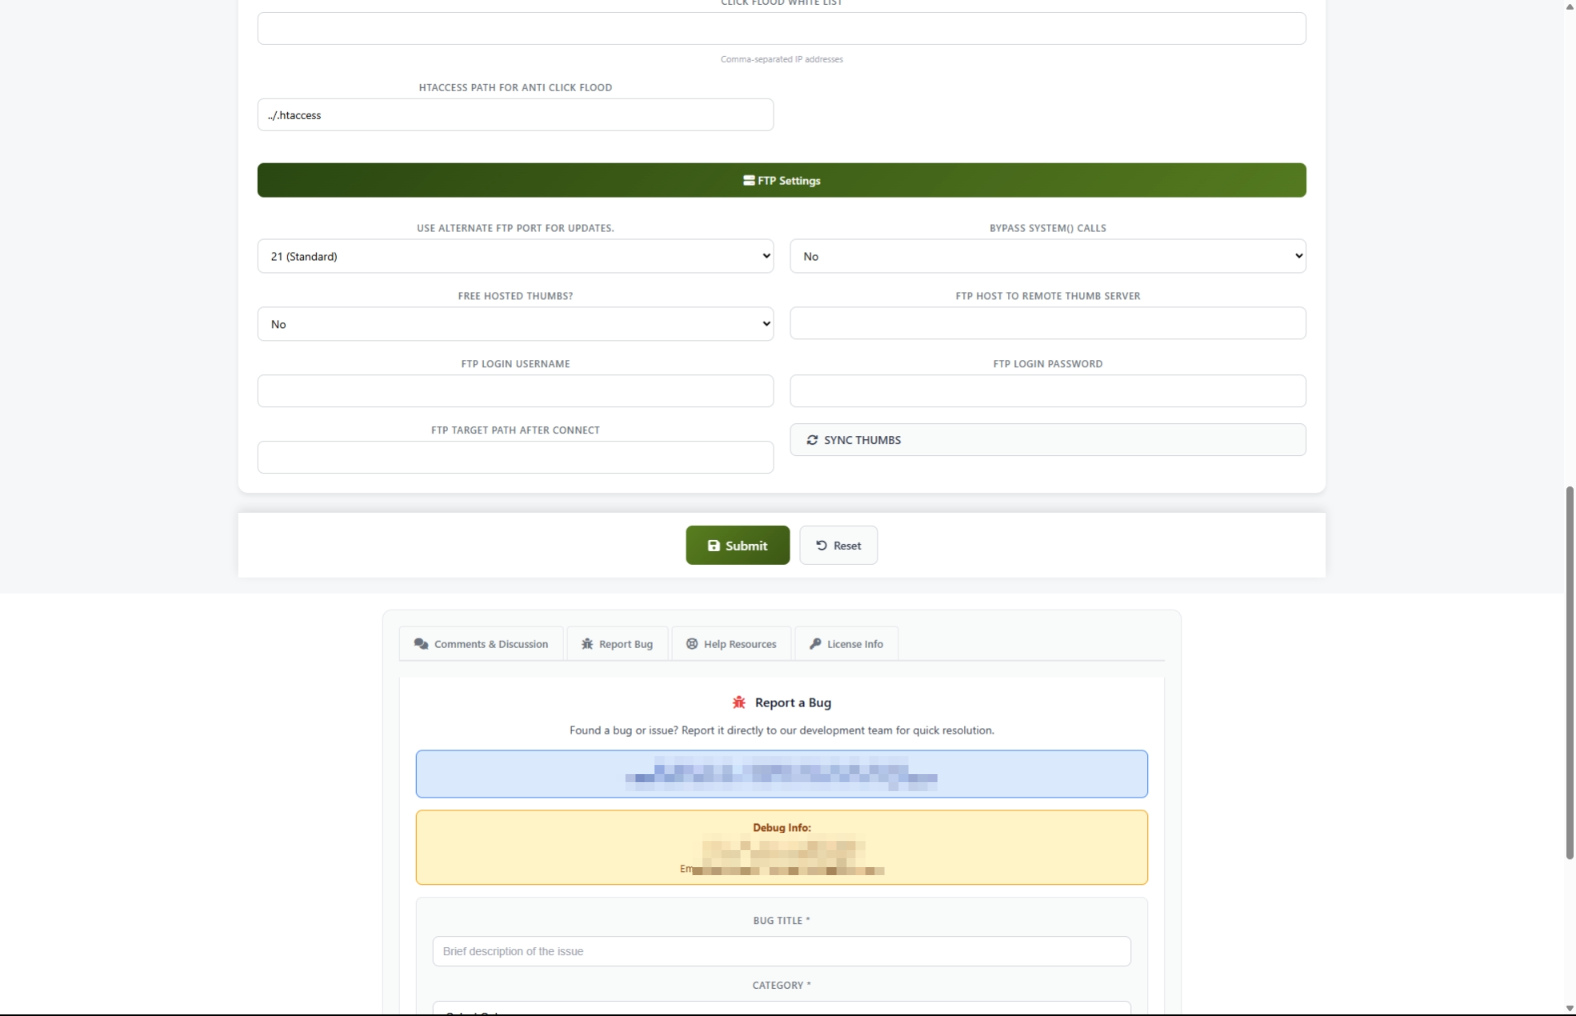
How to Send Thumbnails to a Remote Server
If you use a separate server or CDN to serve your thumbnail images, you can set up automatic syncing.
- Click the MySQL Setup tab.
- Scroll to the FTP Settings section.
- Set Remote Thumbs to Yes.
- Fill in your remote server details:
- FTP Host -- The address of your remote server
- FTP Username -- Your login name for the remote server
- FTP Password -- Your password for the remote server
- FTP Path -- The folder on the remote server where thumbnails should be stored
- Click Submit to save the settings.
- Click the SYNC THUMBS button to start uploading.
- A progress window appears showing each file being transferred. Wait for it to finish.
How to Control Content Submissions
You can control who is allowed to submit content to your site and how often.
- Click the Gallery Submit tab.
- Under Accept Galleries, choose who can submit:
- No Submits -- Nobody can submit (useful during maintenance)
- All -- Anyone can submit
- Partners Only -- Only approved partners can submit
- Preferred Only -- Only your VIP submitters can submit
- Set the Submit Period to control how many hours a person must wait between submissions.
- Set Max Guest Posts to limit how many submissions a non-partner can make per day.
- Set Max Partner Posts to limit daily submissions from partners.
- Click Submit.
How to Set Up Content Scanning
Content scanning automatically checks submitted galleries for quality and security before they appear on your site.
- Click the Gallery Scanning tab.
- Set Scan Submissions to Yes to turn on automatic checking.
- Under Script Checks, set these recommended values for safety:
- Allow Popups -- No
- Allow Flash -- No
- Allow IFrames -- No
- Under Duplicate & Word Checks:
- Set Disallow Duplicates to Yes to prevent the same content from being submitted twice.
- Set Use Blacklist to Yes to block known problem sources.
- Under Image Validation, set minimum quality standards:
- Min Image Points -- Start with
15(increase for stricter quality) - Max Server Ping --
3000(blocks very slow servers)
- Click Submit.
Settings and Options
Site Information Settings
Thumbnail Settings
Submission Control Settings
Operation Settings
Admin Control Settings
Tips for New Users
- Save often. After changing a few settings, click Submit before moving to another tab. If something goes wrong, you will know which change caused the issue.
- Test after every change. Open your site in an incognito window after saving to see how your changes look to visitors.
- Start simple. You do not need to fill in every setting right away. Begin with the Site Information tab, then set up thumbnails, and adjust other settings as needed.
- Use the Help System. Turn on the Help System in the Admin Control tab. Helpful tooltips will appear next to each setting to explain what it does.
- Keep notes. Before changing a setting, write down what it was set to previously. This makes it easy to undo if something breaks.
Troubleshooting
You see "Access for this address is banned"
What you see: A message saying your address is banned when you try to open the Settings Control Center.
How to fix it: Your internet address needs to be added to the access list. Contact the person who installed ComusThumbz or your hosting support team to add your address to the allowed list.
Settings are not saving
What you see: You click Submit but your changes do not stick, or you see an error about a token.
How to fix it:
- Refresh the page completely by pressing Ctrl+F5 (or Cmd+Shift+R on Mac).
- Make your changes again.
- Click Submit.
- Avoid using the browser back button after saving -- always navigate forward.
A web address field keeps going blank after saving
What you see: You enter a web address into a field like the Click Flood Error URL, but after saving it is empty.
How to fix it: Make sure you include the full address starting with http:// or https://. Addresses without this prefix are not accepted.
Thumbnail sync fails
What you see: You click SYNC THUMBS and see an error message in the progress window.
How to fix it:
- Double-check that your FTP Host, FTP Username, and FTP Password are correct.
- Make sure the FTP Path folder exists on your remote server.
- Save your FTP settings by clicking Submit before clicking SYNC THUMBS.
- If you continue to have problems, contact your remote server provider to confirm your login details.
Thumbnails are missing after a sync
What you see: You ran a thumbnail sync and now some thumbnails are not showing.
How to fix it: This is expected behavior. After a successful sync, thumbnail files are moved to your remote server and removed from the main server. If your remote server settings are correct, the thumbnails should load from the remote server. If they are not loading, check that your remote server is accessible and the files were transferred successfully.
Your site looks broken after changing settings
What you see: Pages look different, links do not work, or images are missing after you saved changes.
How to fix it:
- Go back to the Settings Control Center.
- Check the Domain Name field on the Site Information tab. Make sure it matches your actual domain exactly (without
http://orwww.). - Check the Thumbnail Width and Thumbnail Height on the Links & Thumbnails tab. Make sure they are reasonable numbers (not zero or extremely large).
- If you cannot figure out which setting caused the problem, contact support with a description of what you changed.