General Settings
What This Page Does
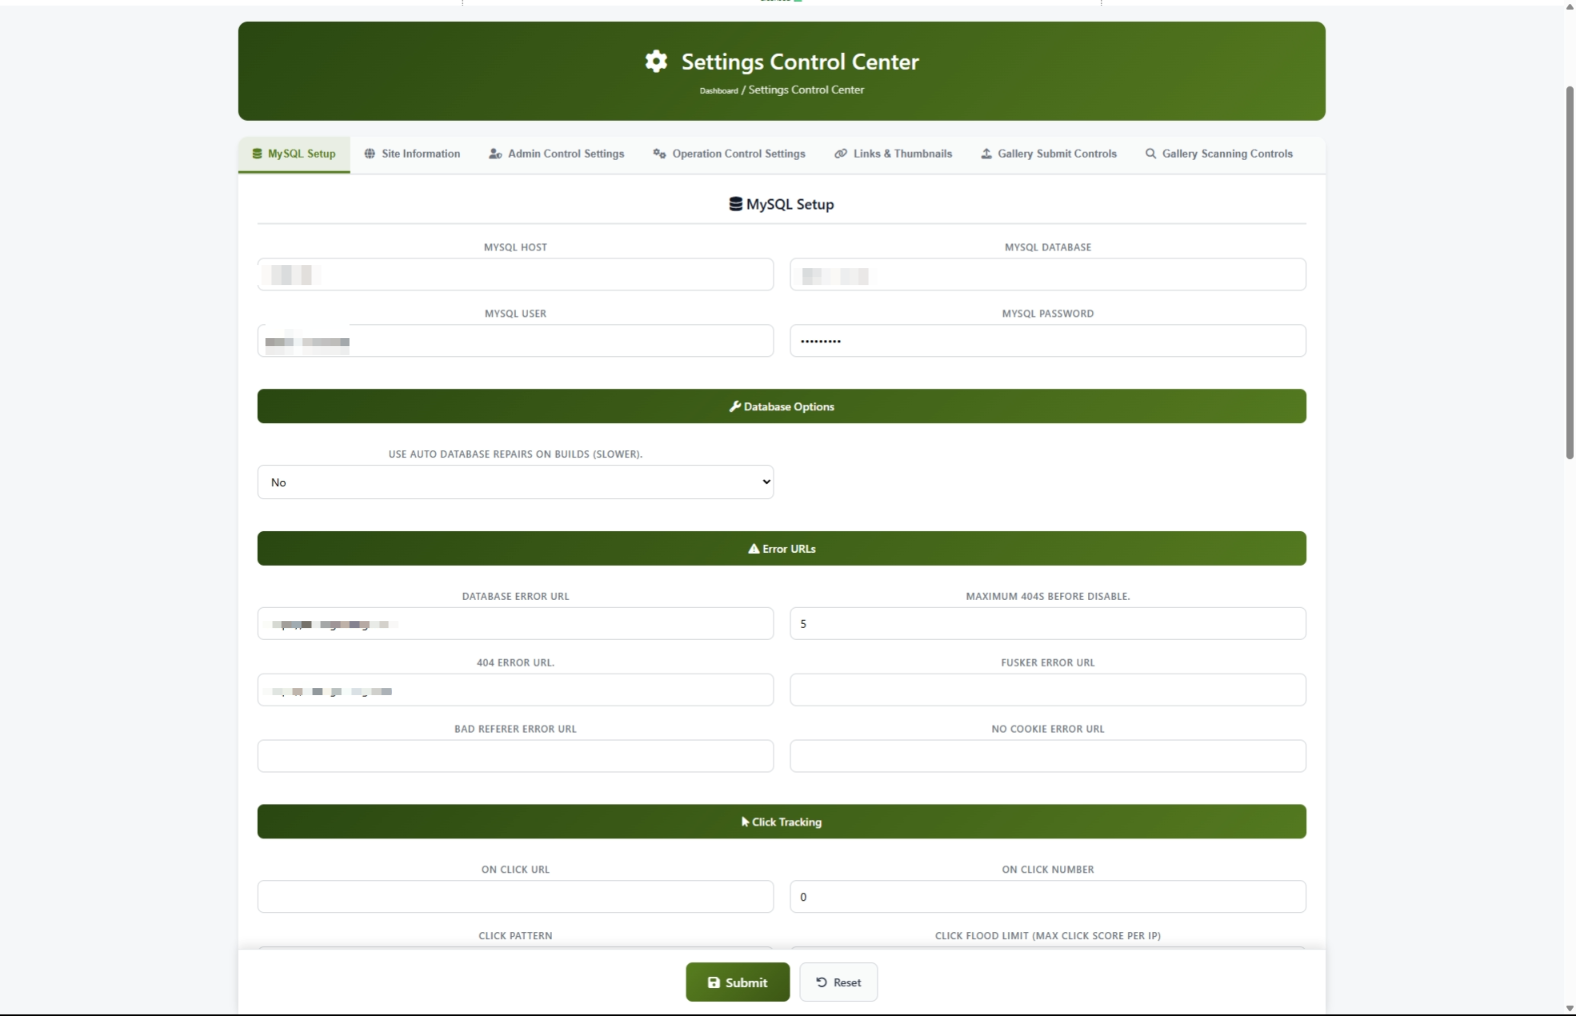
The Settings Control Center is the central hub where you manage all the core settings for your site. From here, you can set your site name, control how thumbnails look, manage content submissions, configure error pages, and much more. Think of it as the master control panel for everything your site does.
How to Get Here
Navigate to Admin Panel > Settings > General Settings
Understanding the Page
When you open the Settings Control Center, you will see a row of tabs across the top of the page. Each tab groups related settings together so you can find what you need quickly.
The Tab Bar
There are seven tabs along the top:
Click any tab to switch to that section. The active tab is highlighted with a green border at the bottom.
#scanning at the end of the web address.The Save Button
At the bottom of the page, you will find the Submit button to save your changes and a Reset button to undo unsaved changes.
Common Tasks
How to Set Up Your Site Name and Details (First-Time Setup)
When you first install ComusThumbz, this is one of the first things you should do.
- Click the Site Information tab.
- Type your site name in the Site Title field. Keep it under 60 characters. This is what appears in browser tabs and search engine results.
- Type a short description of your site in the Site Description field. Keep it between 150 and 160 characters. This is what search engines show below your site name.
- Type your domain name in the Domain Name field. Use just the domain without "http://" or "www." -- for example,
example.com. - Type your email address in the Admin Email field. This is where system notifications are sent.
- Type your name or company name in the Owner Name field.
- Click Submit at the bottom of the page.
- Open a new private/incognito browser window and visit your site to confirm the title and description appear correctly.

How to Configure Thumbnail Sizes
Thumbnails are the small preview images that appear in grids on your site. Here is how to set their size and quality.
- Click the Links & Thumbnails tab.
- Scroll down to the Thumbnail Settings section.
- Set the Thumbnail Width in pixels (for example,
220). - Set the Thumbnail Height in pixels (for example,
180). - Set the Thumb Quality to a number between 1 and 100. Higher numbers mean better quality but larger file sizes.
- Click Submit.
How to Configure Error Pages
Error pages are where your visitors are sent when something goes wrong. Setting these up properly keeps visitors on your site instead of showing them confusing error messages.
- Click the MySQL Setup tab.
- Scroll to the Error URLs section.
- Fill in each field with a full web address (including
https://):
- Database Error URL -- Where visitors go if the site has a temporary problem. Use a simple "We'll be back soon" page.
- 404 Error URL -- Where visitors go when they try to reach a page that does not exist.
- No Cookie Error URL -- Where visitors go if their browser blocks cookies.
- Click Submit.
http:// or https://. If you leave off the prefix, the address will be silently cleared when you save.How to Set Up Click Protection
Click protection prevents automated bots from abusing your site by clicking links too quickly.
- Click the MySQL Setup tab.
- Scroll to the Click Tracking section.
- Set the Click Flood Limit to control how many clicks are allowed before a visitor is temporarily blocked. The default of
180works well for most sites. - Enter a web address in the Click Flood Error URL field. This is where blocked visitors are sent.
- If you want to make sure you or trusted partners are never blocked, add your internet addresses to the Click Flood Whitelist field, separated by commas.
- Click Submit.
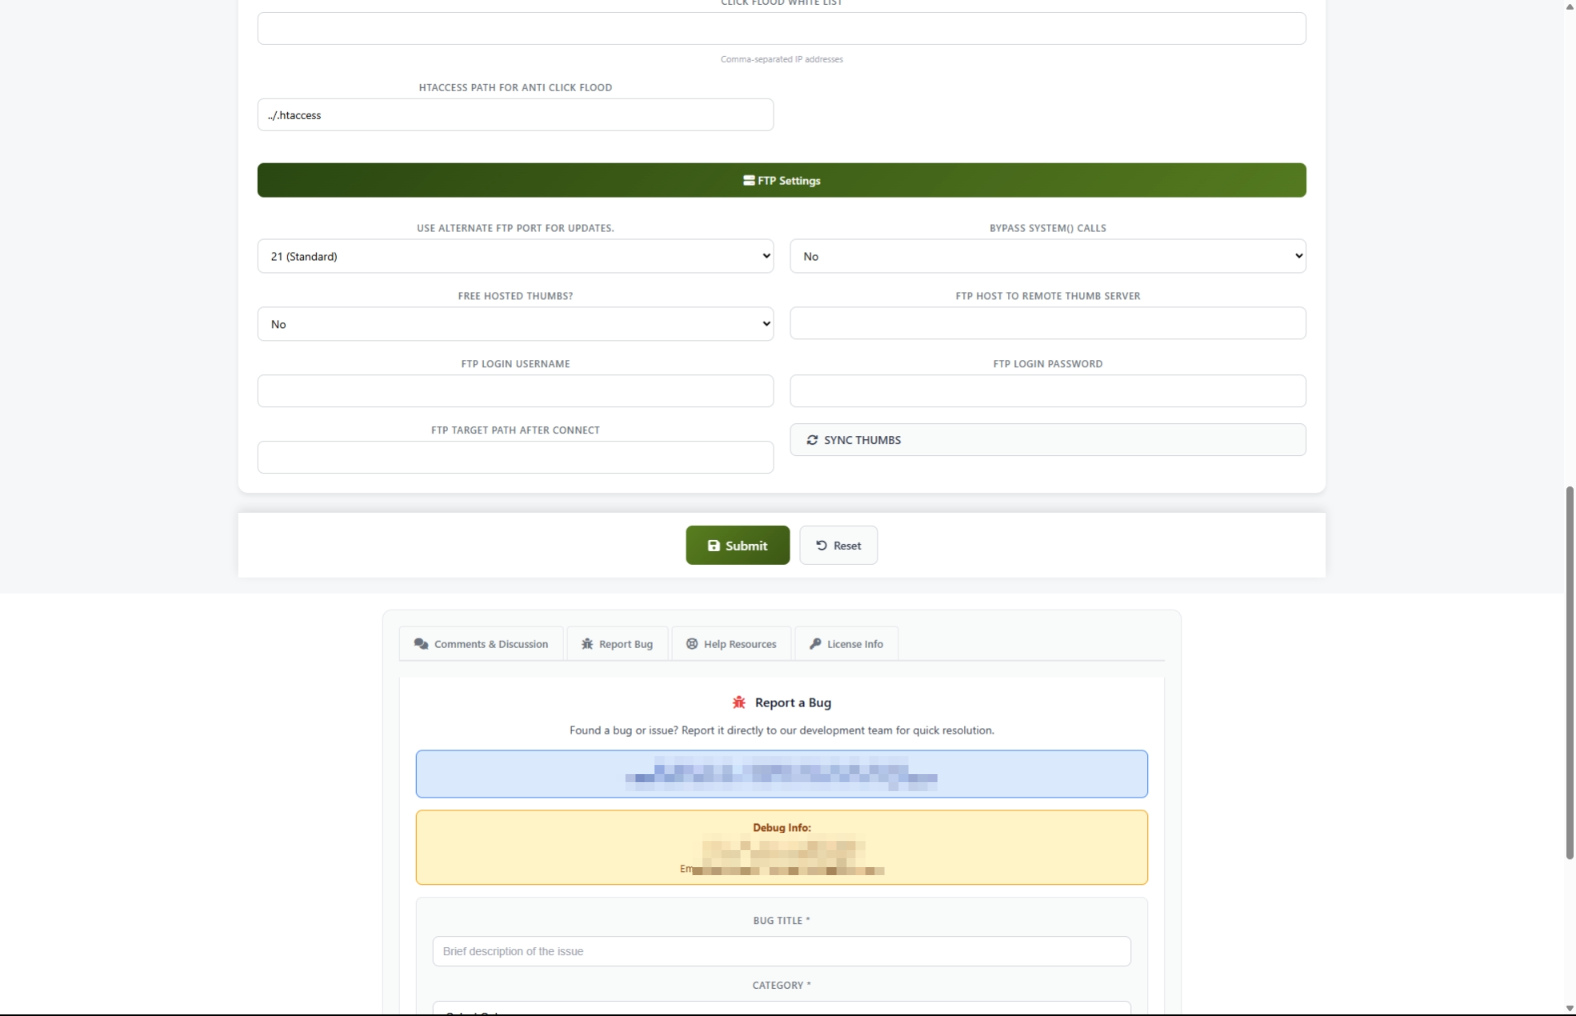
How to Send Thumbnails to a Remote Server
If you use a separate server or CDN to serve your thumbnail images, you can set up automatic syncing.
- Click the MySQL Setup tab.
- Scroll to the FTP Settings section.
- Set Remote Thumbs to Yes.
- Fill in your remote server details:
- FTP Host -- The address of your remote server
- FTP Username -- Your login name for the remote server
- FTP Password -- Your password for the remote server
- FTP Path -- The folder on the remote server where thumbnails should be stored
- Click Submit to save the settings.
- Click the SYNC THUMBS button to start uploading.
- A progress window appears showing each file being transferred. Wait for it to finish.
How to Control Content Submissions
You can control who is allowed to submit content to your site and how often.
- Click the Gallery Submit tab.
- Under Accept Galleries, choose who can submit:
- No Submits -- Nobody can submit (useful during maintenance)
- All -- Anyone can submit
- Partners Only -- Only approved partners can submit
- Preferred Only -- Only your VIP submitters can submit
- Set the Submit Period to control how many hours a person must wait between submissions.
- Set Max Guest Posts to limit how many submissions a non-partner can make per day.
- Set Max Partner Posts to limit daily submissions from partners.
- Click Submit.
How to Set Up Content Scanning
Content scanning automatically checks submitted galleries for quality and security before they appear on your site.
- Click the Gallery Scanning tab.
- Set Scan Submissions to Yes to turn on automatic checking.
- Under Script Checks, set these recommended values for safety:
- Allow Popups -- No
- Allow Flash -- No
- Allow IFrames -- No
- Under Duplicate & Word Checks:
- Set Disallow Duplicates to Yes to prevent the same content from being submitted twice.
- Set Use Blacklist to Yes to block known problem sources.
- Under Image Validation, set minimum quality standards:
- Min Image Points -- Start with
15(increase for stricter quality) - Max Server Ping --
3000(blocks very slow servers)
- Click Submit.
Settings and Options
Site Information Settings
Thiết lập mẫu ảnh
Submission Control Settings
Operation Settings
Admin Control Settings
Tips for New Users
- Để dành thường xuyên. Sau khi thay đổi một vài cài đặt, click Gởi trước khi chuyển sang thẻ khác. Nếu có gì không ổn, anh sẽ biết sự thay đổi nào gây ra vấn đề.
- Kiểm tra sau mỗi thay đổi. Mở trang web của bạn trong một cửa sổ ẩn danh sau khi lưu để xem các thay đổi của bạn trông như thế nào với du khách.
- Bắt đầu đơn giản thôi. Bạn không cần điền vào mọi bối cảnh ngay lập tức. Bắt đầu với thẻ thông tin Site, rồi đặt hình thu nhỏ và điều chỉnh các cài đặt khác khi cần thiết.
- Dùng hệ thống trợ giúp. Bật Hệ thống trợ giúp trong bảng điều khiển quản lý. Những lời phê bình hữu ích sẽ xuất hiện bên cạnh mỗi khung cảnh để giải thích những gì nó làm.
- Nhớ ghi chú. Trước khi thay đổi bối cảnh, hãy ghi ra những gì đã được định sẵn trước đó. Điều này làm cho nó dễ dàng xóa bỏ nếu một cái gì đó phá vỡ.
Name
Các bạn thấy đấy, "Sự thành công cho địa chỉ này bị cấm đoán"
Những gì bạn thấy: Một thông điệp nói địa chỉ của bạn bị cấm khi bạn cố gắng mở Trung tâm Điều khiển.
Cách sửa chữa nó: Địa chỉ Mạng của bạn cần được thêm vào danh sách truy cập. Liên lạc với người đã cài đặt ComusThumbz hoặc nhóm hỗ trợ máy của bạn để thêm địa chỉ của bạn vào danh sách được cho phép.
Thiết lập không lưu
Những gì bạn thấy: Bạn nhấn Gởi nhưng những thay đổi của bạn không dính vào, hoặc bạn thấy một lỗi về một vật kỷ niệm.
Cách sửa chữa nó:
- Cập nhật toàn bộ trang bằng cách nhấn Ctrl+F5 (hoặc Cmd+ Shift+R trên Mac).
- Thay đổi lần nữa.
- Ấn Gởi.
- Tránh dùng nút lùi của trình duyệt sau khi lưu... luôn luôn di chuyển về phía trước.
Name
Những gì bạn thấy: Bạn nhập một địa chỉ Mạng vào một lĩnh vực giống như địa chỉ URL lỗi Nước Lụt nhấp chuột, nhưng sau khi lưu nó đã rỗng.
Cách sửa chữa nó: Hãy chắc chắn rằng bạn bao gồm đầy đủ địa chỉ bắt đầu với http:// hay https://Các địa chỉ không có tiền tố này không được chấp nhận.
Lỗi đồng bộ mẫu ảnh
Những gì bạn thấy: Bạn nhấn SYNC THUMBS và thấy thông điệp lỗi trong cửa sổ đang chạy.
Cách sửa chữa nó:
- Kiểm tra lại xem Máy FTP. Tên người dùng FTP, và Mật khẩu FTP là đúng.
- Đảm bảo Đường dẫn FTP Thư mục tồn tại trên máy phục vụ từ xa của bạn.
- Lưu thiết lập FTP bằng cách nhắp vào Gởi trước khi nhắp vào SYNC THUMBS.
- Nếu bạn tiếp tục gặp vấn đề, hãy liên lạc với nhà cung cấp máy phục vụ từ xa để xác nhận chi tiết đăng nhập.
Hình thu nhỏ bị thiếu sau khi đồng bộ
Những gì bạn thấy: Bạn đã chạy một đồng bộ hình thu nhỏ và bây giờ một số hình thu nhỏ không hiện.
Cách sửa chữa nó: Đây là hành vi mong đợi. Sau khi đồng bộ thành công, các tập tin ảnh mẫu được di chuyển vào máy phục vụ từ xa và bị gỡ bỏ khỏi máy chủ chính. Nếu thiết lập máy phục vụ từ xa của bạn đúng, các hình thu nhỏ nên tải từ máy phục vụ ở xa. Nếu không tải, hãy kiểm tra xem máy phục vụ từ xa của bạn có thể truy cập được hay không và các tập tin đã được chuyển đổi thành công.
Nơi Mạng của bạn có vẻ bị hỏng sau khi thay đổi thiết lập
Những gì bạn thấy: Trang khác, liên kết không hoạt động, hoặc ảnh còn thiếu sau khi bạn lưu các thay đổi.
Cách sửa chữa nó:
- Quay lại Trung tâm Điều khiển Thiết lập.
- Kiểm tra Tên miền cánh đồng Thông tin vị trí Hóa đơn. Đảm bảo nó khớp chính xác miền của bạn (không có)
http://haywww.). - Kiểm tra Độ rộng mẫu ảnh và Chiều cao mẫu ảnh trên Liên kết & mẫu ảnh Hóa đơn. Hãy kiểm tra xem chúng là những con số hợp lý (không phải số không hay cực lớn).
- Nếu bạn không thể tìm ra thiết lập nào gây ra vấn đề, hãy liên lạc hỗ trợ với mô tả về điều bạn đã thay đổi.